Saturday, December 4, 2010

More Parts!

I received an email from Shari at ElectroAutomotive that she shipped a box of parts to me.  According to her updated invoice and cross-checking against the parts in the box, I got:

- Circuit breaker, charger mount rubber feet, all battery box holddown studs, mid-exhaust outlet, battery lugs and interconnect straps, hydrometer, bulk wire, 3-wire cable, front-to-rear wire, key switch relay, charger interlock relay, potbox relay, motor overtemp relay, fuse block and fuses, electrical connector kit, trunk lid weatherstripping and the Convert It book.

This means I'm still waiting for:

- motor adapter hub and bushing, motor controller, main contactor, DC/DC converter, battery charger, all suspension parts, heavy cable, wire crimper, cable crimper, engine compartment loom, two high current terminal blocks, battery box weatherstripping and the hood pin set.

I'm glad EA is stepping up and getting me a stream of parts.  There are some significant parts remaining and I'm stuck on the straight path through the steps right now, waiting for the motor adapter hub and bushing.  I'm going to have to jump around a bit, doing what I can with the parts I have.  I'm also doing the renovation in parallel, so there's no lack of things to work on.

Here are the parts in all of their glory:

Sunday, November 28, 2010

The First Electric Part Installation

So I gathered up my courage and jumped into the first step of the installation instructions. 

I cut out the paper template for the motor controller mount and taped it into place.


I got to install my first rivnut.  It's a decent solution to install a blind nut when you can't get access to the back side of the panel.  Since I'm so paranoid about rust, I decided to paint each hole I drill with rust reformer paint.


I then bolted the standoff bracket into place.


Finally I temporarily bolted the motor controller plate with the current-sensing shunt into place.  I don't have the controller yet so I'll have to remove the plate, bolt on the controller and re-mount when it arrives.


Then I decided to move on to the Potbox mount.  I'm a little concerned about leaving the potbox out in the open, where it can get dirt, mud and water inside it, so I plan to make an alternative mounting scenario, placed in a plastic enclosure.  Lucky I thought of this, because my car doesn't match the instructions for mounting the potbox.  The manual shows quite a large "brake equalizer", but mine just has a simple T-junction for the hydraulic brake lines.  I'll have to do some investigation to find out if mine is a post-factory hack or just a different style than ElectroAuto is expecting.  That's the T-junction, right at the top of the paper mounting template, with the line from the master cylinder coming in from the south-east.  It just ain't gonna fit.


Then I decided to review the steps for installing the transmission and motor, and found about half of the needed hardware was not supplied in my parts pickup.  I left a voice mail for Shari and asked her to let me know what's going on with the rest of my order, because I've had no email or phone contact since my visit to them a couple of weeks ago.  We'll see...

Sunday, November 21, 2010

Starting to Build It Back Up Again

Now that the body is back from the shop and I have the first load of electric conversion parts, I can get started on the main event - making an electric car!

Well, I immediately got sidetracked a bit.  When I got the body back from the shop I noticed a small number of points on the body that need to have the paint touched up.  I left the car on the trailer in case Rainbow wanted it back in their shop to do the work.  Now remember I live in an area that gets about 4-6" of rain per year, and it mostly comes between December and February.  Well guess what happened while I was down in LA working on the installation of a monitoring system for my company REC Solar?  It rained.  And the rain got into everything.  Most of the car was OK, but the floor of the passenger compartment wasn't primed and painted, it just had the original coating from the Porsche factory, which is 37 years old and not in the best shape.  It's amazing how quickly the rust stared forming!  I started working on scraping the coating back to clean metal and dry everything out.  When I'm sure it's dry, I'll treat it with the rust converter fluid.  When that's done its work, I'll spray on a new fresh, full new coating of the mystery stuff on the floor.  It seems to be a rubberized undercoating-type compound; I'll check out my options at the auto parts store tomorrow.

I removed the doors and front hood to make sure they don't get scratched during the conversion, and it also gives me greater access to the parts of the car I need to get to.


The pedal mounting area doesn't have a drain hole and the water pooled up nicely.  I had to remove the unit so I can get access to clean and de-rust the area.

Saturday, November 13, 2010

Went to ElectroAuto and got Some of the Parts

After placing my order with ElectroAuto 22 weeks ago, I've had zero contact and I was getting worried.  They promised 6 - 8 weeks for the whole kit.  Did they order my parts yet?  What is ready for pick up?  Did they go bankrupt and my money is gone?  I knew going in that they were well known for delays in sending parts, but when I stopped getting replies I had to take some action.  Luckily I live about 2.5 hours away from their site, so on Saturday morning I prepped my pickup truck and drive up.

My luck continued to hold as both Mike and Shari were home.  They were sure surprised to see me and Mike said I should have called ahead first.  I explained that I had been calling and emailing for several weeks with no response, so I was here to take whatever parts were ready.  They both went to work around the shop and in a couple of storage bins to pull the parts together.  Mike was very helpful, helping me cross-check the parts and showed me how to use the rivnut tool.  He said at one point "We once had 7 people working here, now it's just the two of us and a drunk".  Hmmm.

After about 3 hours of searching, my truck was loaded up with:Warp 9 motor, transmission adapter plate and spacer, potbox, several mounting pieces, gauges, battery frames & holders (but not the Allthread rods), fans and vent piping, Noalox, grease, transmission fluid, bolts & nuts and some electrical connectors.

So that leaves me still waiting for: Curtis controller, contactor, DC/DC converter, circuit breaker, Zivan charger, Allthread rods, all suspension components, cable, battery lugs, battery interconnect straps, crimpers, engine loom, relays, high current terminal blocks, fuse block, battery box weatherstripping and hood pins.  Shari couldn't tell me if the big expensive parts had even been ordered, and only spoke to me and made eye contact once during my whole visit, saying she would check on the remaining parts.

Luckily I can get started and make good progress while waiting for the other parts.

An alternative exists for me to get the controller, contactor, circuit breaker, DC/DC converter, charger and 2/0 cable.  I met a man at the Alternative Car Show at Hearst Castle about a month ago, and he bought a kit from ElectroAuto about 3 years ago for a VW Bus but never did the conversion.  I've emailed Shari and asked if she hasn't ordered these parts, to return my money for them and I'll buy them from this guy.  We'll see if she responds...

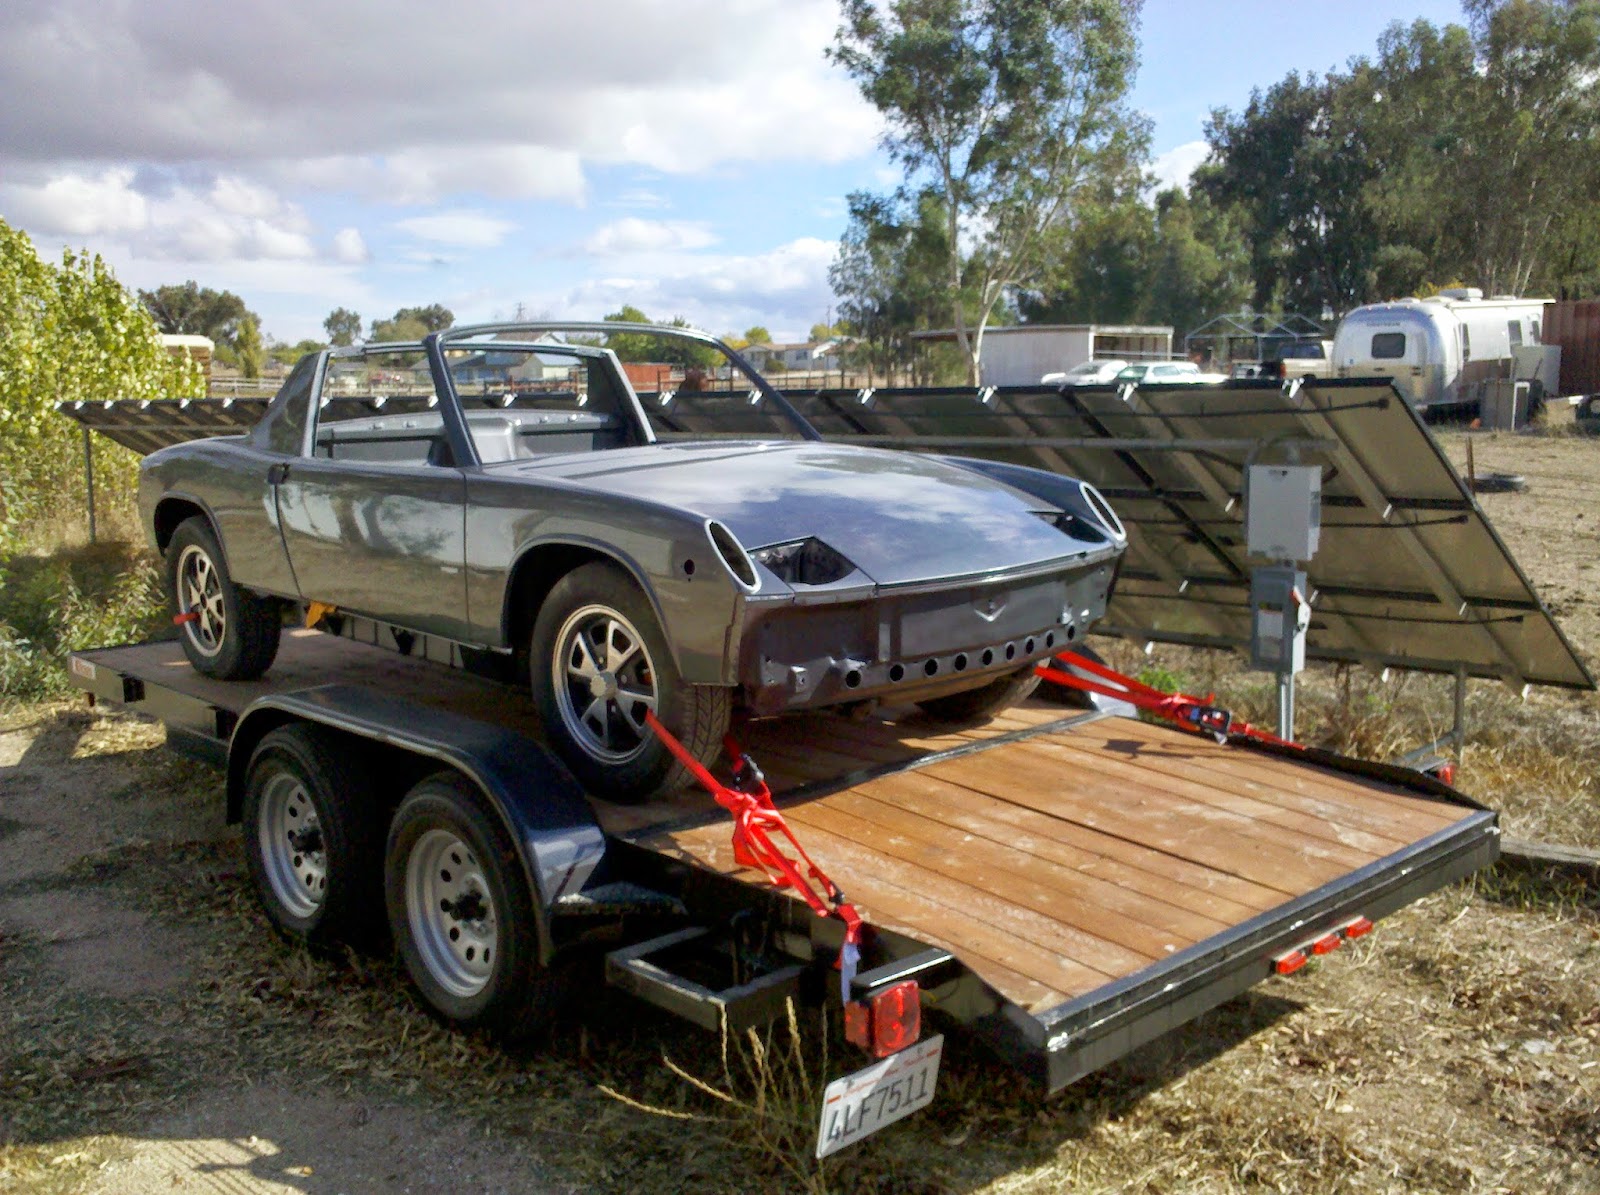
So here are the pictures of the parts!


Saturday, November 6, 2010

Picked up the Body

After 170 days, I picked up the car and brought it back to my house.   The targa top still has to be painted, but I can pick that up any time.  Tom and his crew came in on Saturday to help me load it up.  They did a lot of work in that extended period of time, but we had an agreement that they would work on it between insurance jobs, and charged me $10 / hour less than their standard rate since it's a project car.


I figured the best place to park it while I continue my restoration steps and wait for the electric parts to come in was right next to the solar array.


This is a big milestone in the project, and I'm glad Tom and the team at Rainbow did such a great job.

Wednesday, October 27, 2010

Final Paint and Clearcoat Complete

The day I've been waiting for for so long has arrived.  The paint and clearcoat are finished.  The only remaining issue is spraying the undercoating, and painting the targa top.  The metallic in the paint doesn't show up well, but trust me, it's in there.


Sunday, October 24, 2010

Avila Beach Concours 2010

This weekend is the Avila Beach Concours car show, and unfortunately it was cloudy and drizzly, so attendance was down but there were some great cars nonetheless.

I saw this in the parking lot as I was walking in, the new Honda CRZ hybrid.


 Here are a couple of Lamborghinis and a Porsche 911 GT3 RS

CXC Simulations had a tent, giving demos of their incredible racing simulator.  There are 3 large screens and the driver's seat is on hydraulics to mimic the feel of the track as you drive.  They have hundreds of cars and courses available.  They had pictures of famous drivers using the sim, including F1 World Champion Lewis Hamilton.


This is the Ariel Atom, hand built in Virginia.  This car is insanely fast, and Jeremy Clarkson just gushed over it on Top Gear.  That's him in the second picture; you have to keep your mouth closed as you drive...


Here is a favourite of mine, an Acura NSX, and one of the most beautiful body styles ever, the Porsche Turbo whale tail:


This is a 1937 Bugatti Type 57SC.  It's as good from the back and the front, and one attendee said it was valued at $4 million.


This is a rare mid-60s Toyota sports car, designed by Toyota but built by Yamaha, including Yamaha piano builders for the woodwork.


And this one is for my Dad, a 1953 Jag XK120, hot off a frame-off restoration and several upgrades such as an E-Type rear-end, a 5 speed synchromesh transmission and a more-recent paint color.


Seat Restoration

When I got the car, the seats were in pretty bad shape.  Both seat pads had cracks at the stitching lines, and the driver's seat had cracks in the vinyl on the seat's side.


After a quick, disheartening thought of gluing the seams on the seat pads, I ordered two vinyl pads and a vinyl seat back from Autos International.  They came in very quickly and I started working on the repairs.  I used copious amounts of contact cement that I originally bought to restore the dashboard, but the seat restoration needs a *lot* of contact cement, so be prepared!  Don't use the spray stuff out of the can, use the stuff you get from a specialty fabric store that's specifically for gluing vinyl.

First I pulled the bad vinyl off both seat pads, and replaced it.  Luckily I had a pneumatic stapler in my woodworking toolbox, because each pad takes about 50 staples to hold it in place.  My friend Gary at G Rides took some time out of his work on Ferraris, Lamborghinis and Porsches to re-rivet the seat-holder-clips into place.

Then I went to work on the driver's seat.  I stripped it apart and found some problems with the foam, so I repaired the issues before starting to put the new vinyl on.


The new seat cover was sized perfectly, and the result is great.  Here are the completely new driver's seat, and the original passenger seat with new pad vinyl.  The driver's seat is on the left, with a matte finish from the new factory vinyl, and the passenger seat on the right with a bit of shiny patina...


I also restored the seat slider mechanisms, cleaning them, grinding off rust and oxidation, repainting and clearcoating.  Nobody will see these without sticking their head under the seats, but I know they're there and they look great!

Tuesday, October 5, 2010

Steve Pittelli is selling his completed 914 electric conversion

If you live near San Luis Obispo California, Steve Pittelli is selling his recently-completed 914 electric conversion.  The electric kit is the same one I'm getting from ElectroAuto.  The price he has it listed for is less than the cost of the car, parts and batteries, so it's a great deal on a way to jump right into the world of electric cars.  I almost bought Steve's car in not-quite-finished state, but he decided to complete the project.

His ebay auction is here http://cgi.ebay.com/ebaymotors/ws/eBayISAPI.dll?ViewItem&item=320599517320#ht_750wt_966

He uploaded some YouTube videos of an introduction to the car and his first few rides:

http://www.youtube.com/watch?v=MpvF-dKX3n8

Good luck on the sale Steve, and to whoever buys it.

Saturday, September 4, 2010

Welcome to Home Power Magazine readers

My article, titled "KEEPING TABS ON YOUR PV SYSTEM" has just been published in Home Power magazine, issue 139.

It's a survey of the products and technologies on the market for monitoring your home solar power and overall energy management, which fits in well with my job as the Monitoring Systems Engineer at REC Solar...  You can go to the magazine's web site at http://homepower.com to view sample issues or subscribe to the digital or print editions.

If you have questions about solar power or your monitoring options, I can probably steer you in the right direction!

A fully clean Transmission

Four sessions and around ten hours later, the transmission case is clean enough to eat off.  Compare the pictures here with the one I took when I pulled the transmission off the engine.  It was coated in grime and under the grime was some patchy black paint.  I don't think the paint is factory, so I went all the way down to fresh metal.  I bought two wire bristle wheels at Lowe's and used them in my cordless drill.  This was much more productive than the wire brush I used at the beginning.  I posted a question on the 914EV forum about how I should treat the finished product.  The consensus was to leave it bare or paint it silver metallic, so I sprayed with clear, hoping to avoid any oxidation and to set up a good base for the next time I want to clean.


Friday, August 27, 2010

Start of Final Paint!

I stopped in at Rainbow today to find they are working on the final paint.  They started by spraying the front trunk, passenger compartment, rear trunk, inside door panels and underside of the front and rear trunk lids.  They plan 4-5 coats here and then the exterior surfaces, followed by the clearcoat.  The color looks very deep and rich metallic gray, even in the poor shop lighting you see in the pictures below.