Showing posts with label Bumper. Show all posts

Sunday, January 8, 2012

Front Bumper and Front Spoiler

When I bought the car it was missing the "front spoiler", which bolts to the underside of the front bumper.  A Porsche replacement part is over $500, so that's out of the question.  I found the "Special Edition" front spoiler on Pelican Parts for $98.95.  The descripion says

"Originally used on the Limited Edition 914s, this front spoiler will make a great addition to your 914."

Not a lot of detail, but the picture on the web site shows a black-colored spoiler, looking good, so I went ahead and ordered it a few weeks ago.  I was hoping it was metal, but if not, then hard rubber would be OK.


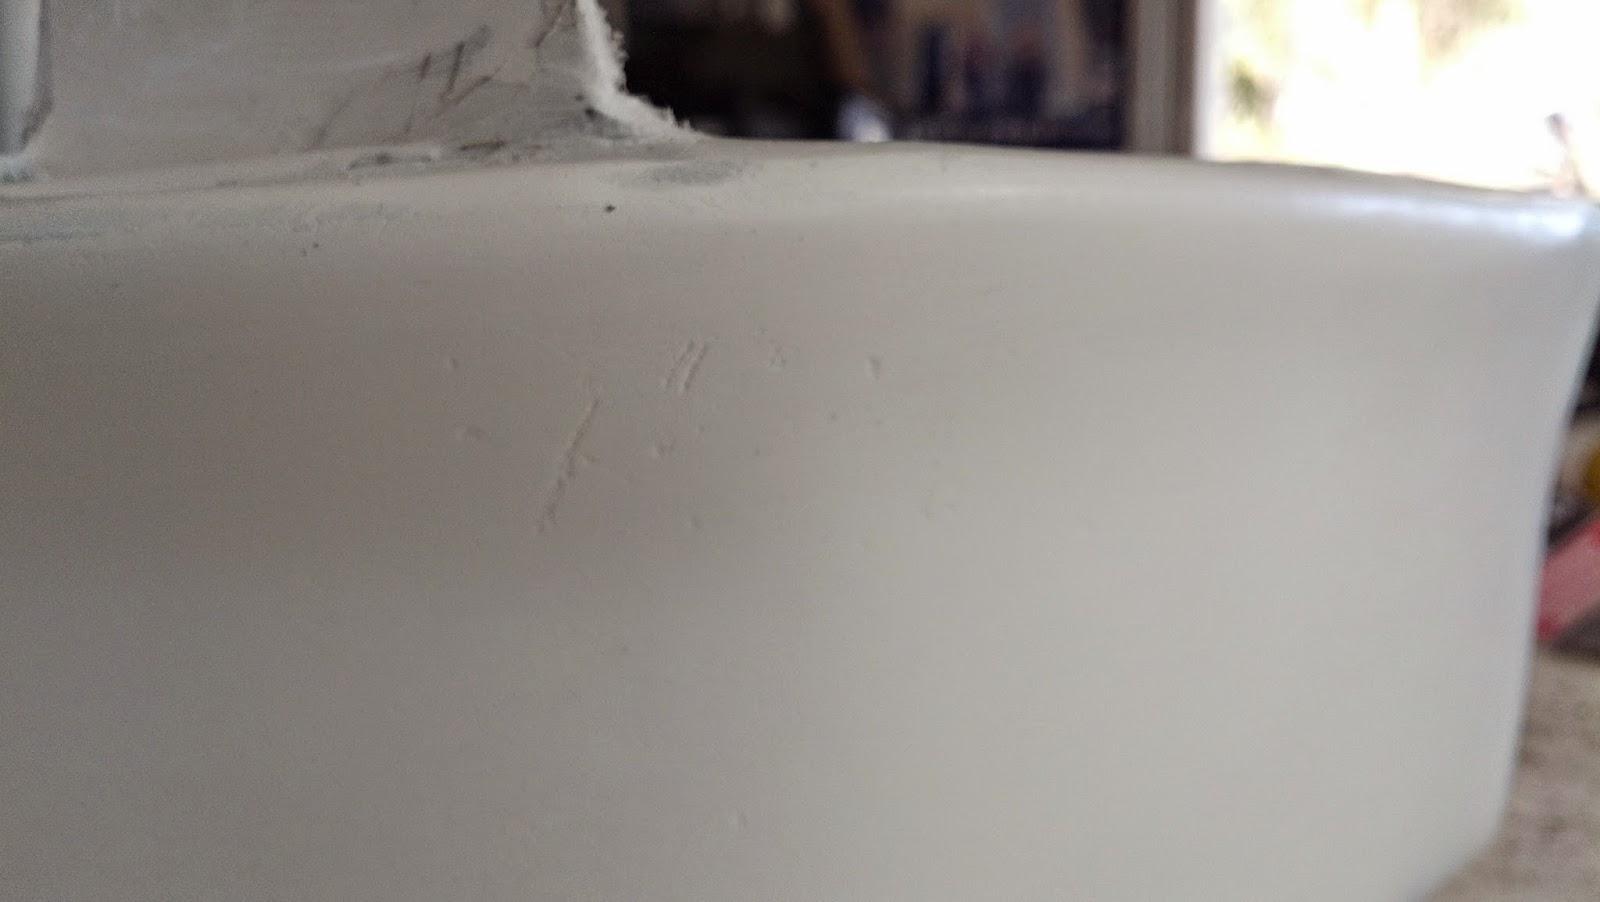
When it arrived, I was very disappointed.  First, it's made of fiberglass which it doesn't say on the web site.  Second it came with a skim coat of white body filler.


Here you can see the terrible job done by the manufacturer in the finishing stage.  It appears they expect buyers to do the final body filler / sanding / priming / painting / clear coating steps.  This is not mentioned on the web site.


I could handle all that, but when I took it out to the car, it was about 3" too short to reach from one side of the front fender to the other.  It's pretty stiff so I wasn't comfortable with trying to bend it into shape, to get 3" of extra width out of it.  To summarize: it's fiberglass, it came unfinished, and it's 3" too small.  So tomorrow I'll call Pelican and get an RMA to send it back.  I get to pay shipping two ways on this oversize box, but it's just not what I'm looking for.

Since I'm not going to use a front spoiler at this time, I bolted the bumper back in place and mounted the fog light frames.

Monday, December 26, 2011

Rear Bumper

The rear bumper is made up of three parts.  The top is a hard rubber trim piece, the middle is the chrome bumper itself, and the bottom is a metal trim piece.  Each came with its own set of problems.

The rubber piece was oversprayed in silver paint from the terrible paint job done on the car at some point.  I worked on that with wet-dry sandpaper for hours until I got it all off.  Then I worked through my wet-dry paper finishing up with 2000 grit to make it as shiny and smooth as possible.  It actually came out looking pretty good, and soaked up a bunch of "Back to Black" rubber conditioner.

The bumper took a good cleaning and then some work chrome polish to bring it back to life.  It looks fantastic!

The lower trim piece is a writeoff.  It is damaged and bent in several places and frankly I like the look of the back of the car without it.  In the future if I decided I can't live without it, I'll either buy a replica or try to fix this one up and bolt it onto the bottom of the bumper.

You can barely see I installed the rear trunk key latch, after cleaning everything really well.


Wednesday, August 3, 2011

Front Bumper Restoration

The next phase of the conversion is the front battery box area which meant that I needed to complete the restoration of the front bumper components.  This turned out to be nicely straightforward until I forgot something...

The main problem with the front bumper, besides just being dirty and gritty, was the rubber cap - it was cracking a bit on the left end and had silver paint overspray on most of it.


I first cleaned the rubber well with my eco green cleaning fluid, then wet sanded it from 180 grit all the way through 2000 grit.  It came out smooth and black and not a hint of silver paint.  Next I mixed up some epoxy and filled the small cracks on the passenger end and when dry sanded that down the same way.  In hindsight I should have mixed some black tint into the epoxy because it looks a bit like grey graining in black stone.  This is before sanding down.


Next I cleaned the horn and fog lights and mounting hardware.  I bolted the horn bracket with a rubber spacer and wired everything up with new connectors crimped on the ends.  The wiring up to the fog light is truly bizarre with a spade connector for ground, and a soldered wire stub that fits into a brass barrel and held in place with a setscrew...


It's important to leave the bolts a little bit loose because the positioning of the horns and lights will be finalized when the bumper is mounted and the silver grills are test-fitted.


And here we are!  The silver grills were in pretty good shape, so I resisted the urge to sand down and repaint.  They're easy to pop off so maybe later...


What I quickly realized is that I'm missing the trim piece that bolts to the bottom of the bumper!  When I bought the car it was in very bad shape - bent, dented, chipped paint, the works.  I did some work on it a long time ago, grinding off the paint and starting to shape the metal back into place.  At some point I need to go back and finish the shaping and paint it, remove the bumper, bolt the trim on and then bolt the whole thing back on.

Well it's starting to look like a car again!