With the former-fuel tank area successfully reshaped for the battery box, I had to restore and reinstall everything that goes in under the cowl. Starting in deep and working my way out, I installed the windshield wiper mechanism. After cleaning, it went in pretty smoothly. Of course I forgot to take a picture of the control connector during the teardown, but a quick Google search found this great picture on the Pelican Parts forum.
With that in place, I cleaned and reinstalled the central airbox and driver and passenger flapper units, installed the hoses and attached the control cables. Warning: this is a non-trivial process. I used a combination of two tutorials on 914 World, an expansion and clarification of the tutorial by Chuckles McGroover (probably not his real name...) on his highly-detailed conversion blog, and the Haynes manual. My sincere thanks to everyone for their pioneering work in this tricky area.
First I installed the defroster vents. The original foam gaskets had turned to powder, so I used weatherproofing strips around the edge. The tricky part came to sticking them through the holes in the metal at the top of the dashboard - the foam would catch and not go through smoothly. I ended up gently scotch-taping some paper around the foam strips, slid them through the holes and gently pulled the paper out.
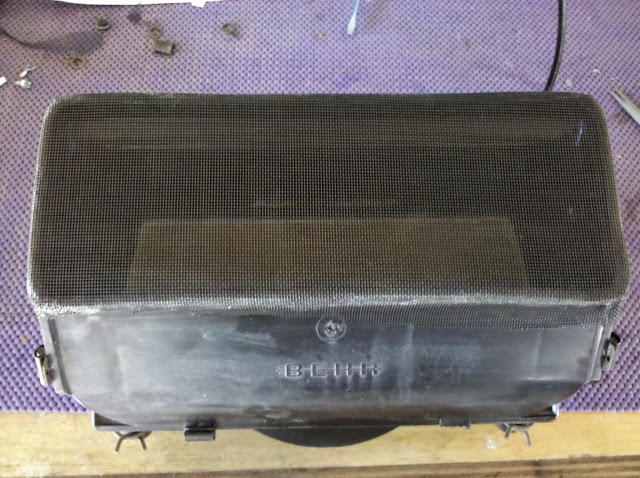
I then prepped the air blower box. When I did the teardown, I found years worth of dirt, leaves and unidentifiable crap inside. I decided to follow web advice and put a piece of screening material over the top of the box. My first attempt to hold it in place was with a couple of long zip-ties, but the area is *very* tight and they wouldn't fit and ended up popping off anyway.
The working solution was to epoxy the screening around the edge of the box. A fairly permanent solution, but I don't intend to be replacing it anytime soon.
Installation was a *major* pain, as it is so tight, right-to-left between the two mounting brackets. I ended up loosening the upright brackets holding the top of the cowl to the shelf of the firewall. It was just enough to force it into place and get the two screws started.
I then followed the tutorials to attach the control cables, and mounted the flapper units, then ran some new flexible hose where it needed to go. So here is the complete job, starting with a wide view, then panning from driver's side to passenger. I like the black motif.
Finally I worked on replacing the spare-tire-pressure windshield washer system with a small electric pump. I ran the wires long and fed them through the hole where the washer hose went up into the steering column's valve, and will replace it with the 944 electric control I bought a long time ago. I bought a new set of squirter nozzles since the rubber on the originals was in rough shape where it fits into the hole in the cowl.
Coming up in the next entry - the engine bay battery box goes in!


No comments:
Post a Comment