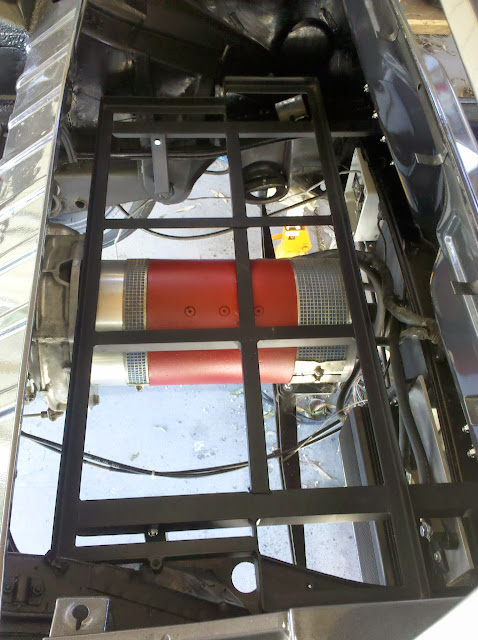
Alert readers will remember my pain of trying to fit the rack into the space. I had to cut out the engine cover latch and a couple of trays. The hell-hole didn't start out too bad, but it wasn't completely dealt with by the body shop and rust kept percolating through the paint. I tried rust-converter and it helped but not completely. I then went to the POR-15 and painted the whole engine compartment. It both halted the rust and added to the black motif. It also covered the scratched paint from all of the times I tried to put the rack in and pull it out again.
Here's the rack support sticking up, waiting for the rack.
You can see the rack is bumping against the semi-vertical brace on the side of the engine compartment. I've seen others grind the rack away just enough, but I just finished pounding out the firewall, so several carefully placed hits and a grinder to smooth it, the rack had enough clearance.
On the passenger side, there is a triangular plate, which I cut away, leaving enough clearance.
And viola! The rack is home for the first time in a test fit. I was surprised by how tight it fit - there's only a few millimeters from the back of the rack to the front of the transmission adapter, and again only a few millimeters between the top of the motor and the bottom of the rack.
Here's where the triangular plate was, after I removed it and ground everything smooth.
And this is the driver's side where I pounded it, then ground everything smooth.
These shots are after the POR-15 treatment.
And now the rack is back in place and ready to bolt to the vertical supports and the metal sheet behind the seats.
And here is how tight the clearance is between the rack and the motor adapter plate. Just a tiny bit of daylight.
Of course I tried to fit in the battery boxes, but they need a little bit of trimming on the plastic edges. I'll save that until later.


No comments:
Post a Comment